8.07.2011

the blt, reworked*


[*let me just start by saying that the diner/yo'-mama's version of this classic (on, gasp, plain 'ole toasted wonder bread) needs no real improvement.  a treat in-and-of itself, to be sure]


...HOWEVER...
TA-DA:
(not yo' mama's blt)
listen, guys:apparently, i'm into nostalgia-themed cookery these days (see whoopie-pie post)...most recently, i have put together a little sandwich i think you might like...sort-of a revamped blt (bacon, lettuce, & tomato), with fried green tomatoes, ham (also fried, crap!), and a fresh basil aioli (when i say "aioli," what i mean is: store-bought-olive-oil-based mayonnaise that i mix with stuff...in this case, basil from the garden)...

(mayo, chopped basil, s&p, ready to be combined to create the aioli)


(fresh basil from the garden...okay if you look really hard, there's some mint in there, too)
...all on lightly toasted challah bread (see previous post for recipe).  listen, i ain't gonna lie: it was delicious (would i be sharing it with all of you folks, otherwise?!?)


(the green tomatoes still on the vine in the backyard)

the first thing i did was fry up 'dem green 'maters ("green tomatoes" = very underripe tomatoes.  in this case, from our garden, but you can find them at many grocery stores, and, frankly, the least ripe tomato you can find, even if it's a little red, will work, here.  just needs to be firm).

(the 'maters, washed and ready to go)

so, here's my fried-green-tomato recipe:
ingredients:
-very underripe tomatoes (4-5, depending on size), sliced about 1/4 to 1/2 inch-thick
-1 1/2 cups buttermilk
-1 cup cornmeal
-1 cup all-purpose flour
-1 tablespoon garlic powder
-cayenne, paprika, sea salt, and ground black pepper to your taste
-1/2-3/4 cup bacon grease
                 -or-
-1/2 cup vegetable oil plus 1 tablespoon butter

1.process your cornmeal in your food processor (i find that, unless you have a super-finely ground cornmeal, many recipes, this one included, benefit from this processing...it eliminates the sometimes too mealy quality whilst still retaining that desirable crunch-factor)

(cornmeal in processor)


2. add the remaining dry ingredients (flour, garlic powder, cayenne, paprika, salt and pepper) to the cornmeal and pulse to combine,

(the dry ingredients, ready to be pulsed)
place the dry ingredients in a bowl and set aside

(the dry ingredients)
3. pour the buttermilk into a separate bowl and season lightly with s&p, set aside

(buttermilk with s&p)

(that's right.  delicious and equally useful bacon fat)
4. heat a heavy-bottomed skillet to medium/medium-high.  add bacon grease (perhaps you keep it around in a jar in the fridge for very such purposes?  perhaps not) or veg oil and butter combo

5. while the oil/grease is melting down and heating up, soak the tomato slices in the seasoned buttermilk

(maters a-soakin')
6. once grease or oil/butter is melted and hot in the skillet,

(bacon grease a-meltin')
dredge the buttermilk-soaked tomato slices, one at a time, in the cornmeal mixture, to coat on both sides

7. fry until golden brown (3-5 minutes per side)

(soaked, dredged maters a-fryin')

8. drain on paper towels
(fried-green-tomatoes a-drainin')
9. now...eat 'em! 
excellent with lemon and hot sauce, buttermilk dressing, etc

OR...

as i suggested, on a sammich'
[here, with a cucumber, feta, and mint salad.  get in my belly (and it did)!]


7.25.2011

another season, another reason...for makin' whoopie...(pies, that is! it's too damn hot for the other kind)

(the completed tower-'o'-whoopie pie "cake")
who doesn't (at least occasionally) long for the simpler days of childhood...for the days of little to no sense of responsibility...the days when every need was met without our even having to ask...the days when mom kept the little debbies at the ready (aside: could "little debbie at the ready" be a song title?  the title of something far less appropriate?  hmmm...something to think on)...when we were far too young to yet read, let alone understand the ingredients' panel?  ah, the bliss of youthful ignorance...
well, folks, the years pass; our palates develop; we learn what things like "processed" and "hydrogenated" and "preservative" mean...
and, yet...snack nostalgia, well, there just ain't  no avoiding it...
THE WHOOPIE PIE to the rescue!!!
was looking forward to getting together with a few other couples and their wee ones on this beautiful summer day.  wanted to bring a special treat that we could all enjoy together (parents and children).  i thought, "what better than a whoopie pie?!?"  the problem: i have never made a whoopie pie.
well, i had just come across a good-looking recipe in "gourmet today"
that i was itching to try.
did so.
was quite tickled with the result.
and, unless the guests were just being kind, i think it was well-liked all around.  i knew i'd hit the nail on the head when my husband (who, per usual, had no clue what i'd been doing in the kitchen all afternoon) asked, "don't take this the wrong way, but are these supposed to taste like a little debbie?"  score!

so, i thought i'd share my bounty.
really, easy-peasy-ish.  i can't wait to experiment with new flavor combos (white chocolate cake with dark fluff or pumpkin cake with cream-cheese fluff, chocolate/peanut butter, dark chocolate/salty almond, cinnamon sugar/apple...).  whoa, cowgirl rein it in, now...task at hand, m'dear...
on to the recipe:

-----------------------------------------

WHOOPIE PIES
(adapted ever-so-slightly from "gourmet today")
total time: about one hour
difficulty (2.75-3)
yield: 12 pies

ingredients:
・for the cakes:
-2 cups all-purpose flour
-2/3 cup unsweetened, dutch-process cocoa powder (i use ghiradelli natural, unsweetened, premium baking cocoa)
-1 1/4 teaspoon baking soda
-1 teaspoon salt
-------
-1 cup well-shaken buttermilk (the low-fat/cultured variety found on most grocery shelves is just fine), room-temp or thereabouts
-1 teaspoon vanilla extract
-------
-1 stick (8 tablespoons) unsalted butter, room-temp
-1 cup brown sugar, packed
-1 egg, room-temp

・for the filling/fluff:
-1 stick (8 tablespoons) unsalted butter, room-temp
-1 1/4 cups confectioners'/powdered sugar (plus more for sprinkling, optional)
-2 cups marshmallow creme/fluff (that's right; i said it: marshmallow fluff.  ha!  the jet-puffed variety of our childhoods...see how i'm a-bringin' this thing full-circle for y'all?)
1. place oven racks on upper and lower thirds of the oven.  then, preheat to 320° (on pure convection.  if your oven doesn't have this feature, pre-heat to 350°, but be extra vigilant of bake-time)
2. grease 2 large baking sheets and set aside
3. in a medium-sized mixing bowl, whisk/fluff/sift the flour, cocoa, baking soda, and salt together.  set aside
(the whisked/fluffed dry ingredients)
4. in a small mixing bowl, combine the buttermilk with the vanilla, set aside
5. in the mixing bowl of your standing mixer*, beat together butter and brown sugar at medium-high speed for 2-3 minutes or until the mixture is pale and fluffy-looking (man, i've used the word "fluff" a lot, here...)
6. add egg, continue to beat well for one minute-ish
7. turn machine off, scrape down the sides of the bowl
8. turn machine back on at low-speed.  begin to add the flour and buttermilk mixtures, alternately, in five additions (flour, buttermilk, flour, buttermilk, flour), allowing the additions to fully incorporate between each addition
9. using a small ladle (gravy-sized or thereabouts...something that will yield slightly less than a 1/4 cup), spoon the batter in small mounds, about 2 inches apart, on your baking sheet (i was able to do 12, with 4 rows of 3 mounds).  repeat on second sheet
10. bake between 10-12 minutes, checking often and switching rack position after 5 minutes

[while cakes are baking, wash, rinse, and dry your standing mixer bowl and attachment]

11. remove cakes from oven and allow to cool completely before assembling


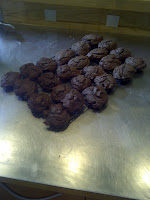
(the cakes, just out of the oven)
(cakes-a-coolin')


12. while cooling, make the filling/fluff:
-combine all ingredients (the marshmallow creme, confectioners' sugar, and vanilla) in your standing-mixer bowl.  beat on medium-high for about 3 minutes, or until smooth
13. assemble the pies by spooning something like a rounded tablespoon of the filling/fluff onto one cooled cake.  place a 2nd cake on top, et...voilà!
(get in my belly!)
(whoopie pie)

*recipe can be made without the aid of a standing mixer.  just use a hand mixer, or, if you wanna brave it by-hand, get ready for a serious upper-body workout!

store in air-tight container, with a layer of parchment or wax between.  good out of fridge for 24 hours; after that, they must be kept cool and very well-sealed

i have opted to put these whoopie pies together in a sort-of free-standing "cake" tower, sprinkled with powdered sugar...just for fun...feel free to copy my style or create your own.  
happy baking!

7.21.2011

challah back, girl

(the pièce de résistance: challah with dark chocolate)


so...maybe it's the hottest day of the year so far, but, frankly, the couple of hours i spent indoors baking with the oven on were much more comfortable than the time i spent doing a little work in the 'ole garden (insert ode to central air).
anyway, i always keep two kinds of home-baked bread at the ready: wheat (*post on the wheat recipe another time) and CHALLAH (holla'!!!!).  i have discovered the addictively delicious result of adding some dark chocolate pieces to the latter, so i always do at least one loaf with 'em, which i call (drums, please): "jewish pain au chocolat."
and just lemme tell you: it is TO DIE FOR...not to toot my own horn or anything, but this is one for the ages.  in fact, i have to restrain myself from making it too often for when i do, i go into "competitive-eater-mode" and demolish the majority of it in one sitting.  oops.

so, thought i'd let you in on my recipe in case you wanna give it a go:

-------------------------------

(CHOCOLATE CHIP) CHALLAH
    -adapted from "joy of cooking," egg bread/challah 
total time (including risings): 3 1/2 to 4 hours
difficulty (on a scale from 1 to 5, with 5 being most difficult): 3.5

ingredients:
-2 packages active dry yeast (or about one tablespoon, if you buy your yeast in bulk, like i do!)
-3 tablespoons, plus one teaspoon sugar
-2 cups, plus 1/4 cup warm water (between 105° and 115°, but i never use a thermometer.  warm to the touch, but not HOT out of the tap'll do ya)
-6 cups bread flour (all-purpose will work if it's all you've got)
-1 tablespoon salt (i use finely ground sea salt, but whatever will do)
-3 slightly beaten eggs (room temp or thereabouts)
-1/4 cup vegetable shortening, plus more for greasings (also room temp)
(-1/2 cup dark or semi-sweet chocolate chunks/chips/whathaveyou, per loaf that you wish to chocolatize. i use ghirardelli "60% cacao, bittersweet chocolate"), optional

1. combine the yeast, the one teaspoon of sugar, and the 1/4 cup warm water, set aside
2. combine the flour and the salt, "sift" (i do not actually own a sifter.  i find that "fluffing" with a fork while combining works well) in your standing mixer bowl (or other large mixing bowl)
3. combine the 2 cups warm water, the eggs, the vegetable shortening, and the 3 tablespoons sugar in a separate, medium-sized bowl
4. check yeast to make sure it's activated (should be slightly frothy/foamy.  if it's not, discard and re-do that step).  assuming yeast mixture is good-to-go, add it to and combine with the water/egg/shortening mixture
5. make a deep well (divet or pit) in your flour mixture.  add the combined yeast/egg/shortening and attach bowl to your standing mixer
6. turn setting on 2 or 3 to begin to stir and combine what will be your challah dough (if you are not using a standing mixer, simply begin to stir to combine.  this recipe does not require a machine, it just makes it a heck-of-a-lot easier . . .)
7. watch for the dough to form a ball that pulls nearly completely away from the sides and bottom of the mixing bowl [you may have to play with adding more water or flour in small increments at this point (water if the dough is not coming together and is "dry" looking; flour if the dough is wet-looking, sticky, not forming a ball nor pulling away from sides, etc)].  when this ball-formation happens, turn your mixer down to its lowest setting (if you are mixing by hand, turn your ball of dough out on a floured surface and begin to knead.  do so for about ten minutes).  let the machine continue to knead the dough for about 3-5 minutes
8. turn dough out (useful tidbit: "turn out" is a fancy way to say: dump) on a clean countertop
9. grease the mixing bowl or another very large mixing bowl (i use shortening to grease, but butter or veg oil would be perfectly fine)
10. place the dough inside the (now greased) bowl.  now, pick it up and turn it over (so that now the top is a little lubed up as well as the bottom and sides)
(what the dough looks like at this stage)*

11. it's time to rise.  i employ many a method.  perhaps my favorite (both in general and certainly for this recipe) is: run the tap water till it's as hot as it gets.  fill a shallow baking pan with the very hot water.  place the hot-water-filled pan on the bottom rack of your oven.  place the dough (i cover it with a dish-towel out of habit, though this precaution isn't likely necessary given the draft-lessness of the enclosed oven space) on the rack closest to the bottom (you may want to remove the third, empty rack, if you have one, to ensure adequate space for the dough to rise)
12. wait one hour or until the dough has doubled in size
(the dough, post-rising/doubling)

13. remove the dough from the oven/its rising quarters
14. punch down the now risen dough (literally, ball up your fist and punch it into the middle of the dough; kinda fun, really)
15. turn out the punched-down, risen dough
16. divide the dough into two equal parts, and knead each piece by hand for a couple of minutes (toward the end of this kneading is when you add the chocolate pieces, if you wish to do so.  just incorporate them into the dough)
17. grease a large baking sheet (again, i use shortening, here)
18. braid the loaves (perhaps the trickiest step)  [i apologize for not having any shots of this process.  next time i bake, i will take some and add them to the post]:

  • cut each of the two sections of dough (each of which will comprise an entire loaf) into three equal-ish parts 
  • roll each third into a (roughly) cylindrical shape of (roughly) 12 inches
  • lay the three pieces side-by-side on the greased baking sheet
  • starting in the middle, loosely braid the three sections, center to end.  tuck end under.  then, braid the other half from center to the other end (this doesn't have to look like perfection), tucking end under to finish, again
  • repeat with the other three pieces
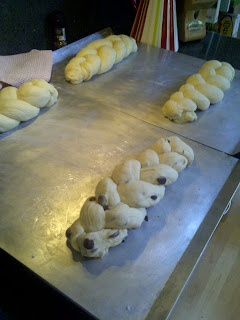
(the now-formed, braided dough, ready to rise a second time)
(another shot of the braided dough)
(one final shot, with a close-up of the dough with the chocolate)

19. cover the now-formed loaves with a dish towel and allow them to rise a second time (this can usually be accomplished just out, wherever in the kitchen.  if it's super cold weather, maybe stick the baking sheet back in the oven for this phase) until nearly doubled in bulk (usually about 45-60 minutes) 
20. brush the now-twice-doubled loaves of dough with french egg wash (one egg yolk slightly beaten and diluted with one-to-two tablespoons of milk)
21. now, to bake:
  • pre-heat oven to 375° on pure convection (if you don't have an oven with a convection feature, pre-heat to 400°)
  • put the baking sheet with the loaves on the middle rack of the pre-heated oven
  • bake for 10-15 minutes
  • reduce heat to 350° (375° if non-convection) and bake until the bread begins to golden on top and sides (about 15-20 minutes more, convection, slightly longer in regular oven)

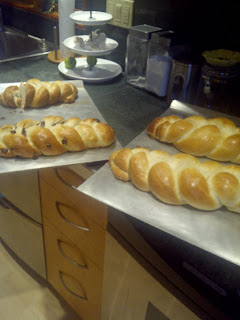
(the finished product!)
(all done!)
*i have made double the recipe in these photos.  i apologize for any confusion.

now, go forth and create!  feel free to post with any questions/comments/etc.

7.17.2011

the summer of the 'shroom

well, there ain't nothing better than a good 'shroom (don't get the wrong idea, here, guys).
i was quite pleased to recently be given a bag of locally hunted chanterelles.
what to do with 'em; what to do???
well, i had some wheat dough (*recipe another time) that was begging to be used, so, PIZZA was the natural choice...
used a base/sauce of pureed steamed sweet potato & fresh tomato.  added fresh mozzarella, the 'shrooms, of course (which i sauteed first in olive oil with garlic and a little salt & pepper), fresh basil (from the garden, bien sur), and a hearty sprinkling of romano.  super hot oven on my pizza stone for something like 15 minutes...et ...voila!